Setting up Rest Client on Visual Studio Code

Until last year I was only using Postman to make all my HTTP Requests but when I was introduced to Rest Client on Visual Studio Code I slowly transitioned into it realizing the benefits of it.
No doubt Postman is great, but the capability to see all my requests on one single page in a rather simple-looking document was enough for the switch. It also comes in very handy when you don't have say the enterprise version of these HTTP tools like Postman to easily collaborate.
For example, I recently started learning NodeJs and created a project. I used the rest-client extension and checked in the HTTP file along with the codebase. So if anyone wants to refer to the API's they have it all there at their disposal. (https://github.com/rajat-srivas/task-manager-api)
Today I am here to share few steps in which you can also utilize the rest-client extension to make HTTP requests in your next project.
Pre-requisite
- Install the Rest Client extension on VS Code https://marketplace.visualstudio.com/items?itemName=humao.rest-client
Making your first GET Request 😄
- Create a file in with .http extension
- Use ### to give a logical name to our API like # Get All tasks
- In the next line enter the HTTP Verb
- GET in this case followed by the URL of the request
- Add any header in the next line like below
- A-line would automatically be inserted just above our request URL with the link saying Send Reuqest
- Click on it to trigger the request
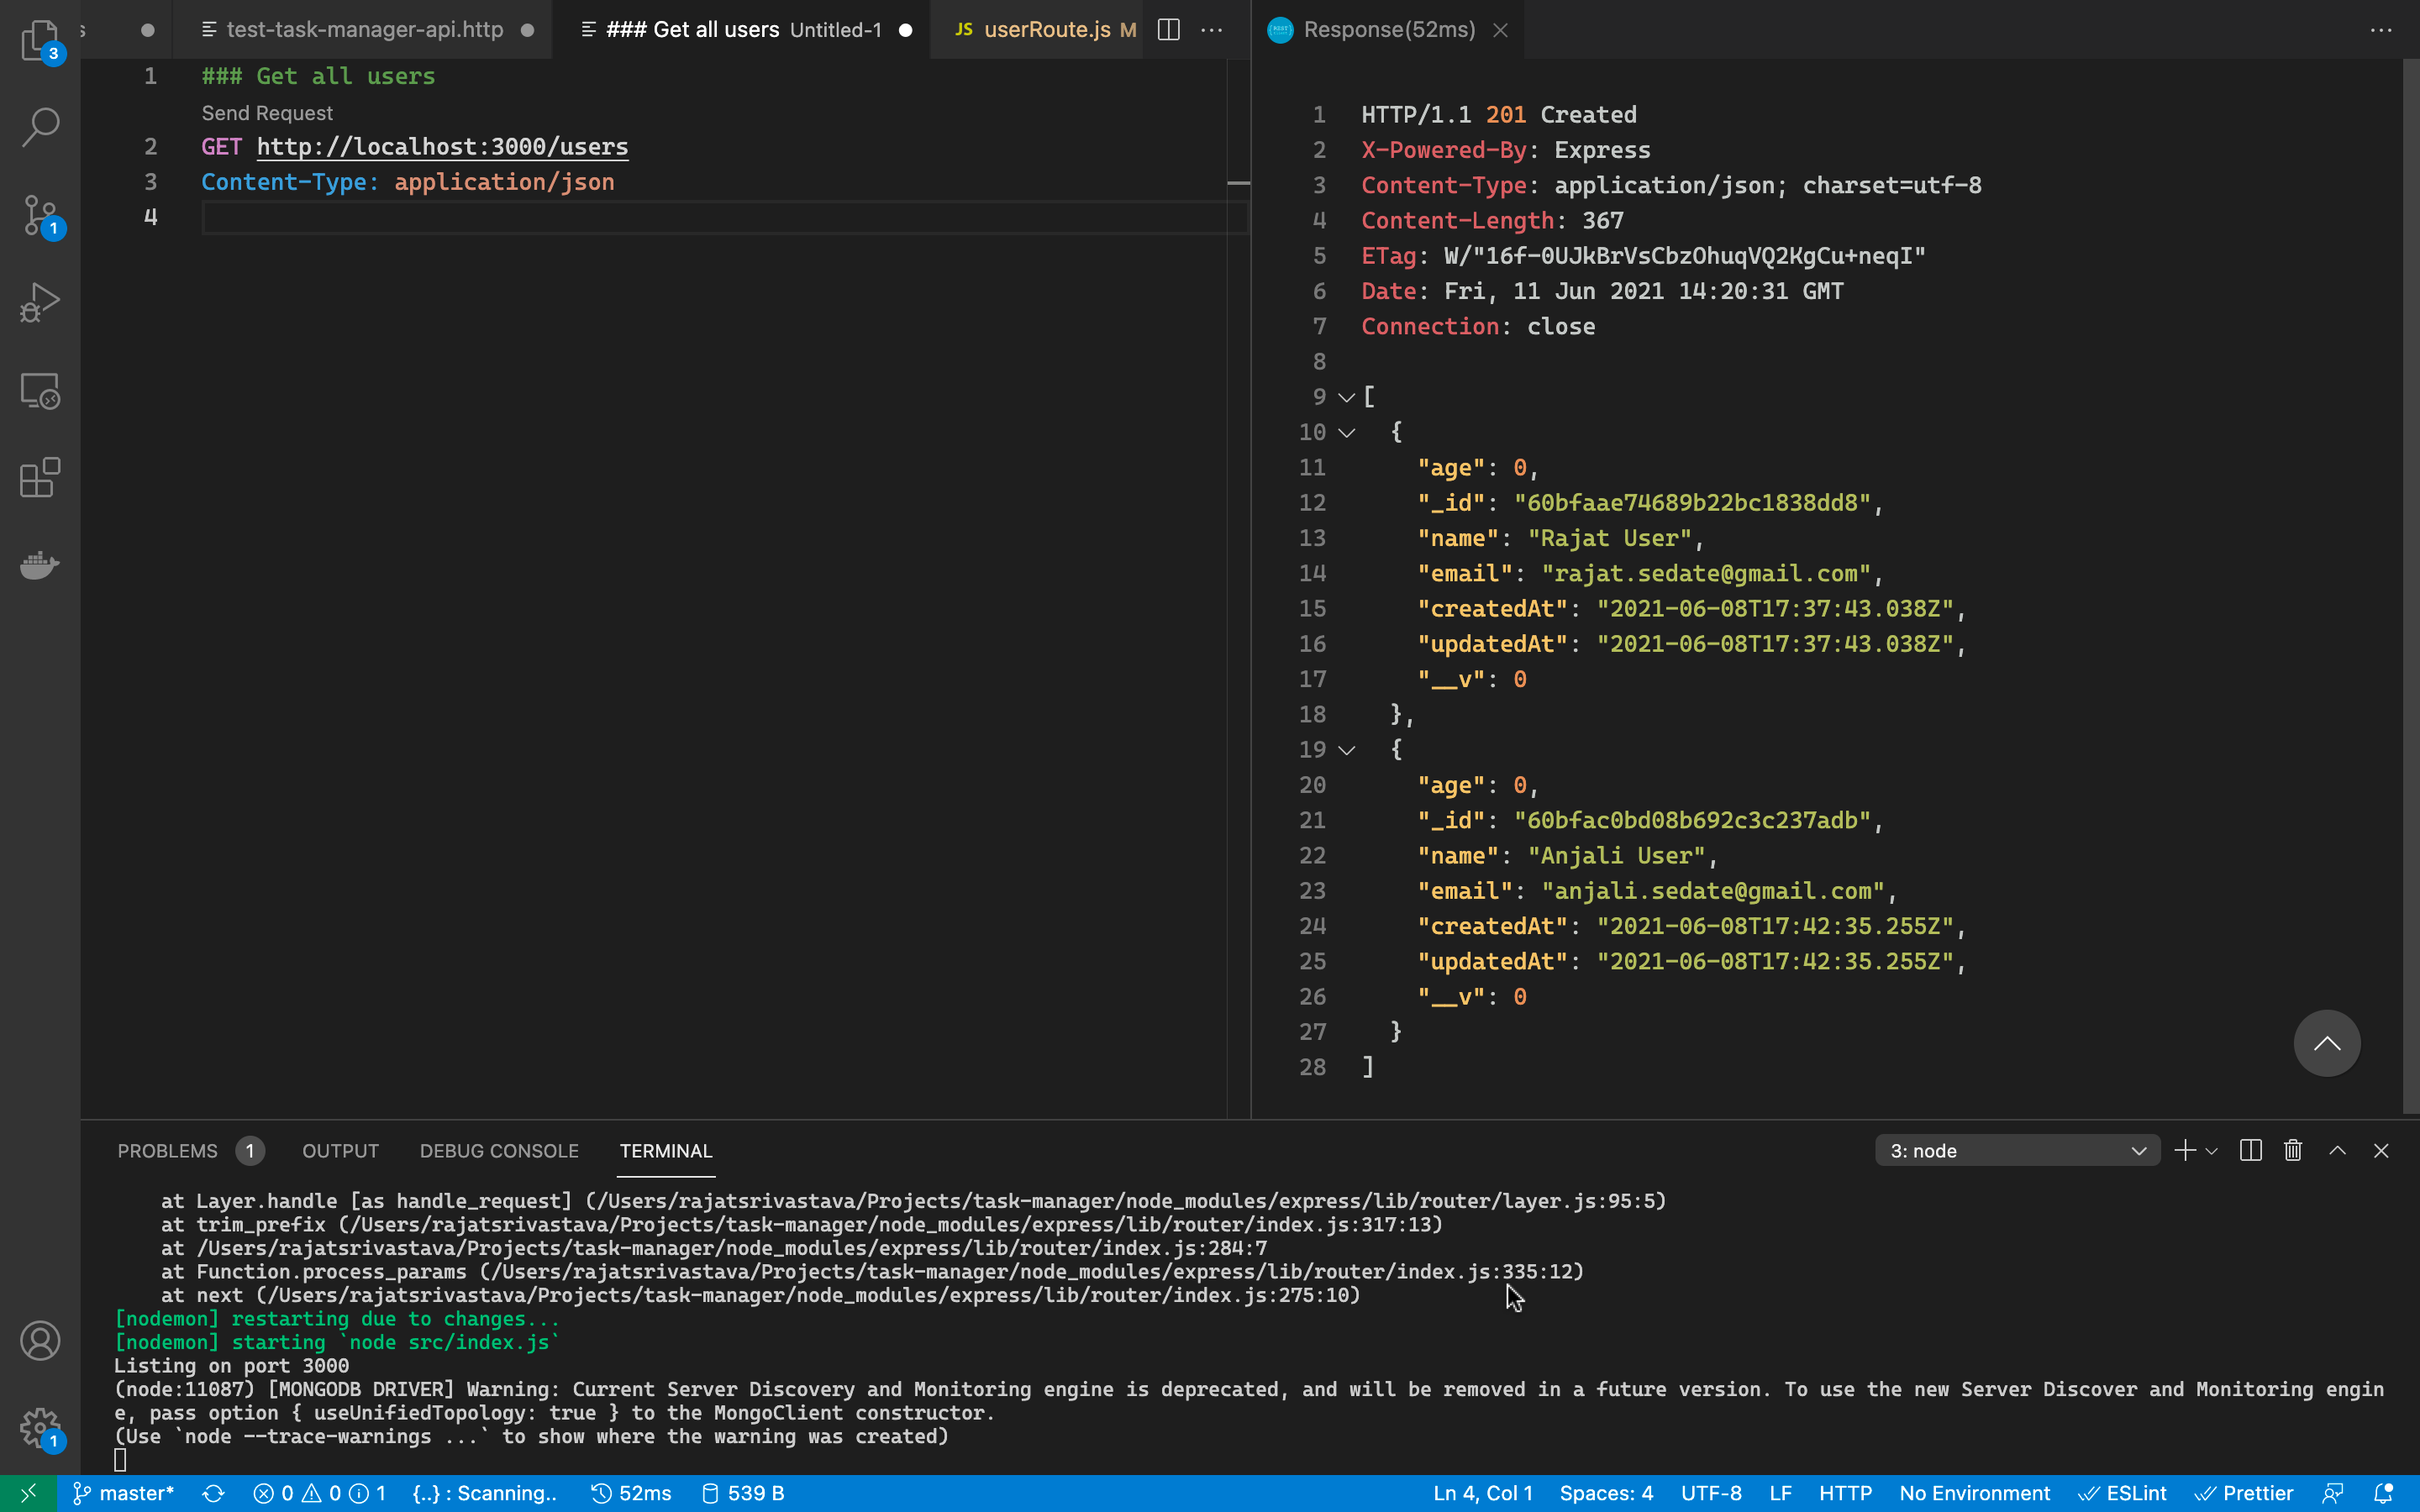
### Get all users
GET http://localhost:3000/users
Content-Type: application/json
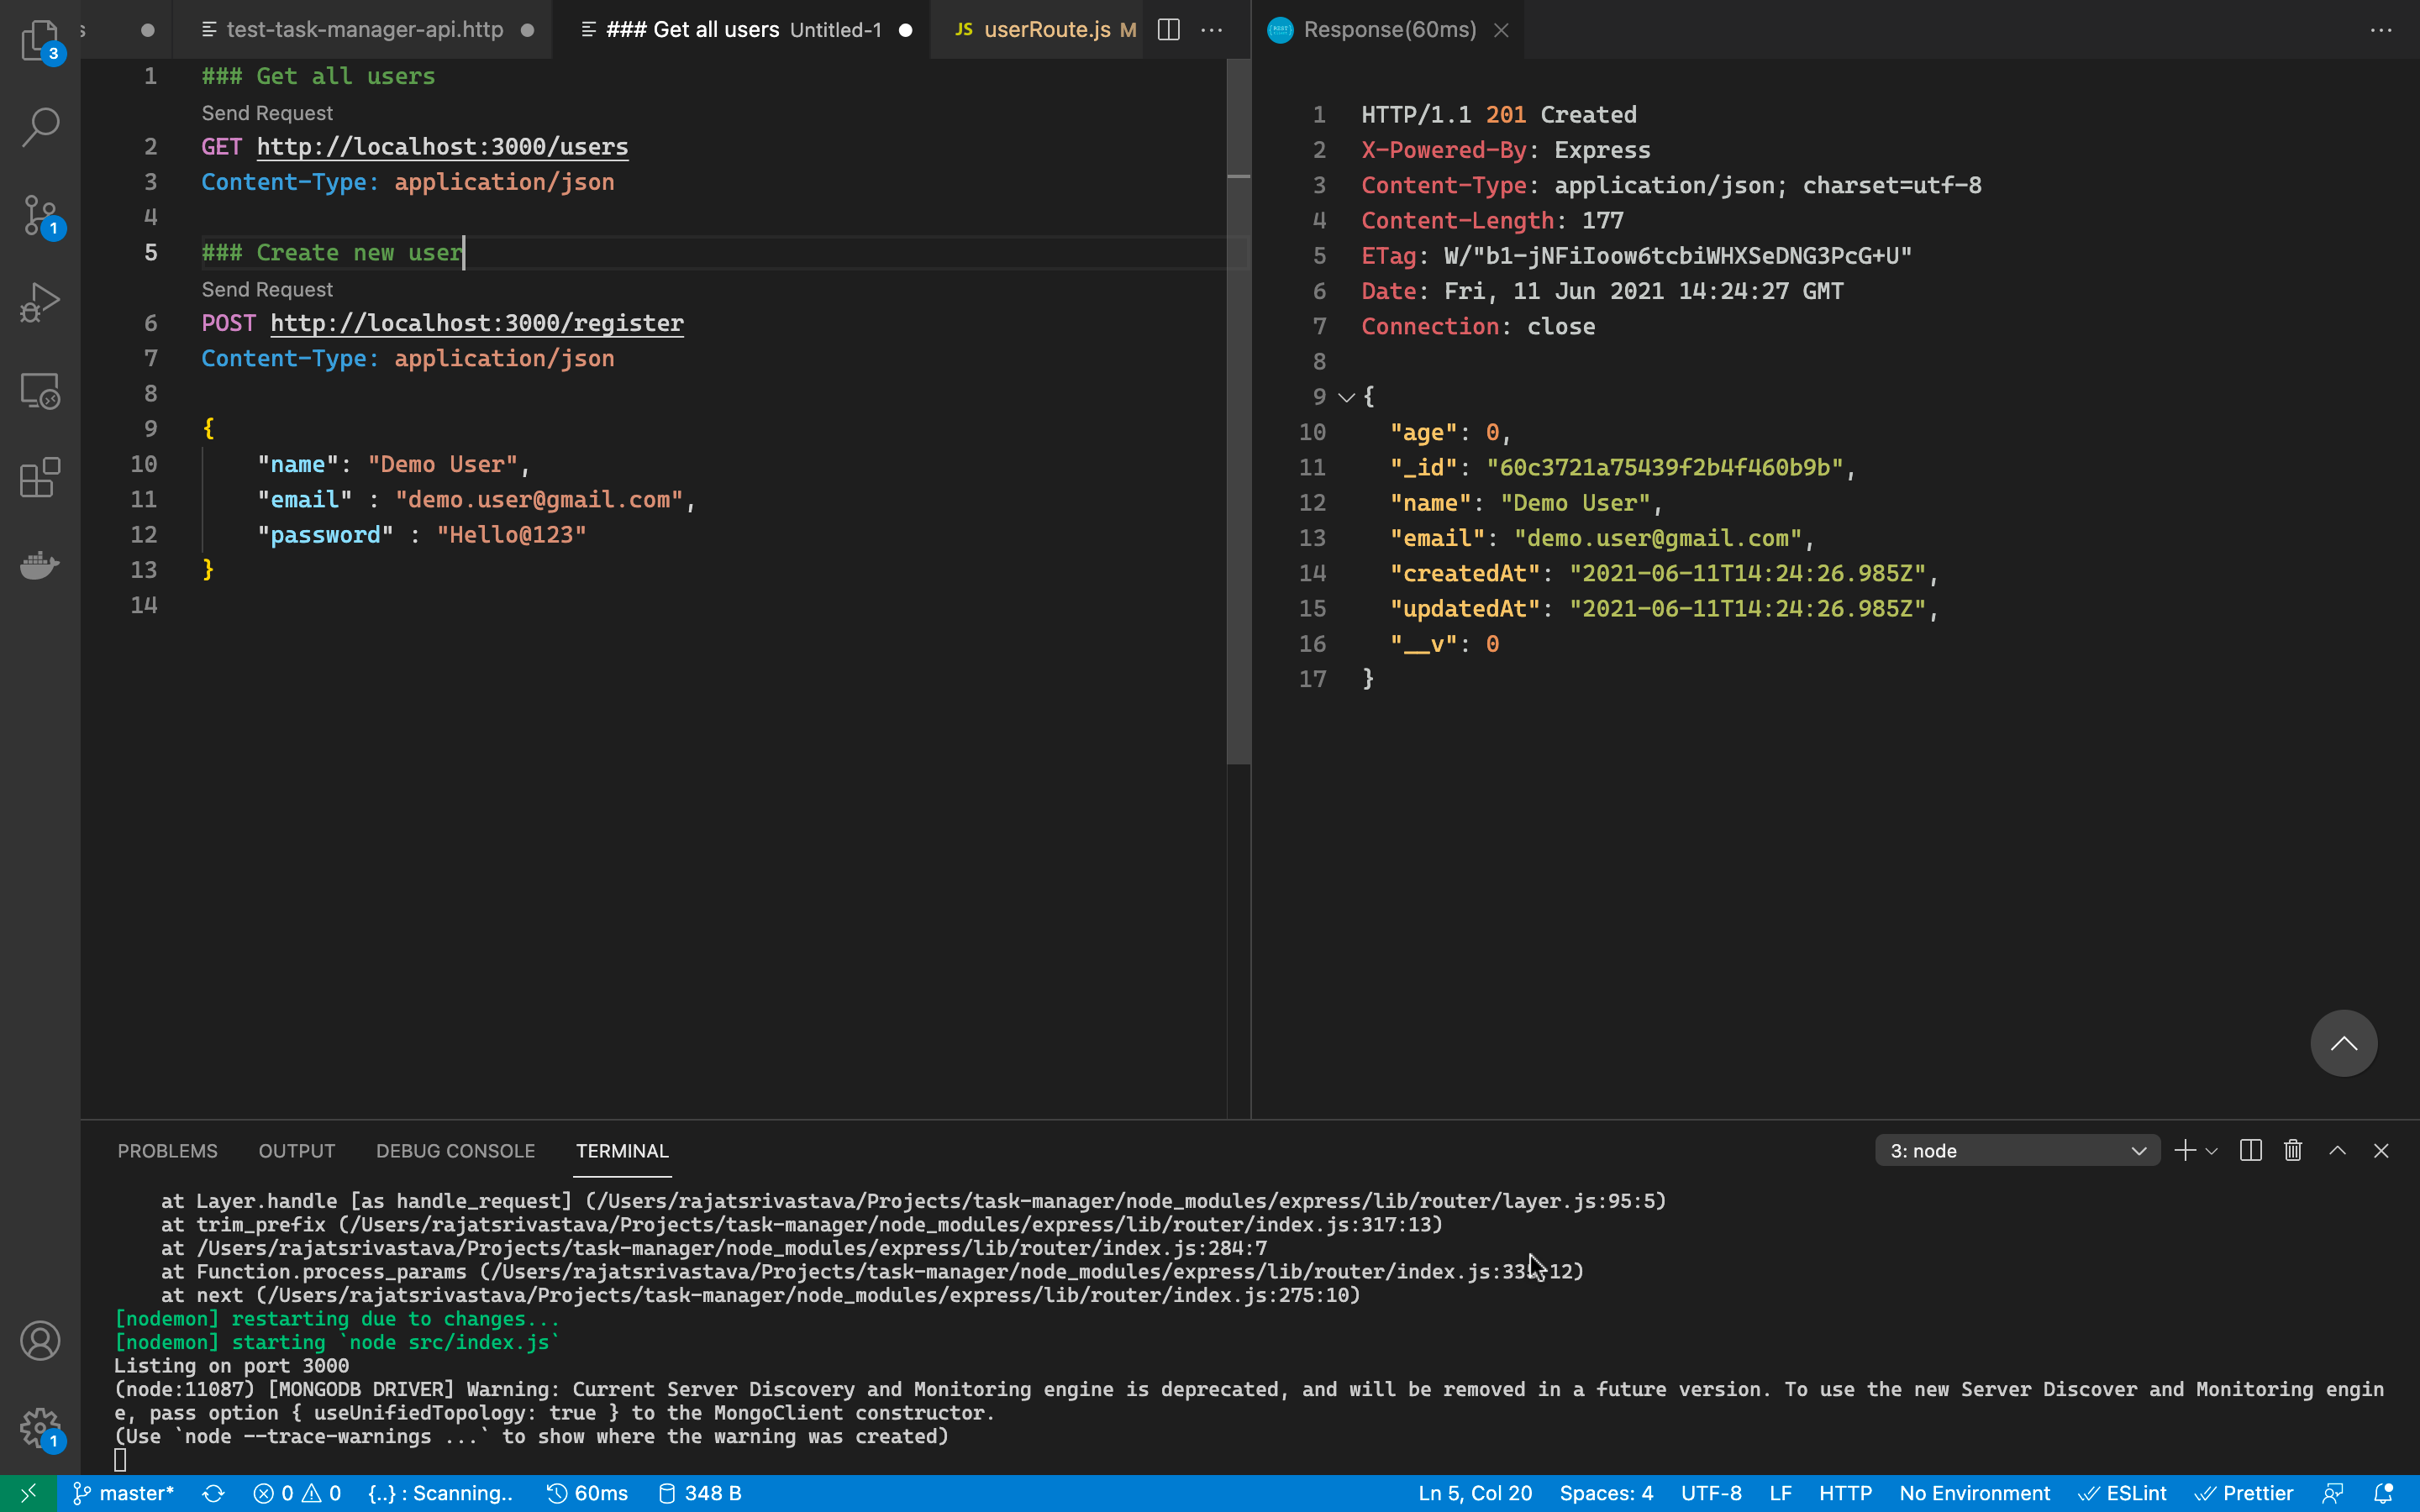
Making a Post Request with payload
- Making a POST request is also quite similar, we will just update the HTTP Verb to POST
- To add the request body, just copy and paste your JSON after the headers and click on Send Request
POST http://localhost:3000/register
Content-Type: application/json

{
    "name": "Demo User",
    "email" : "demo.user@gmail.com",
    "password" : "Hello@123"
}
Making a request for other verbs is also similar and hence I would like to move on to the next step to ease these requests process
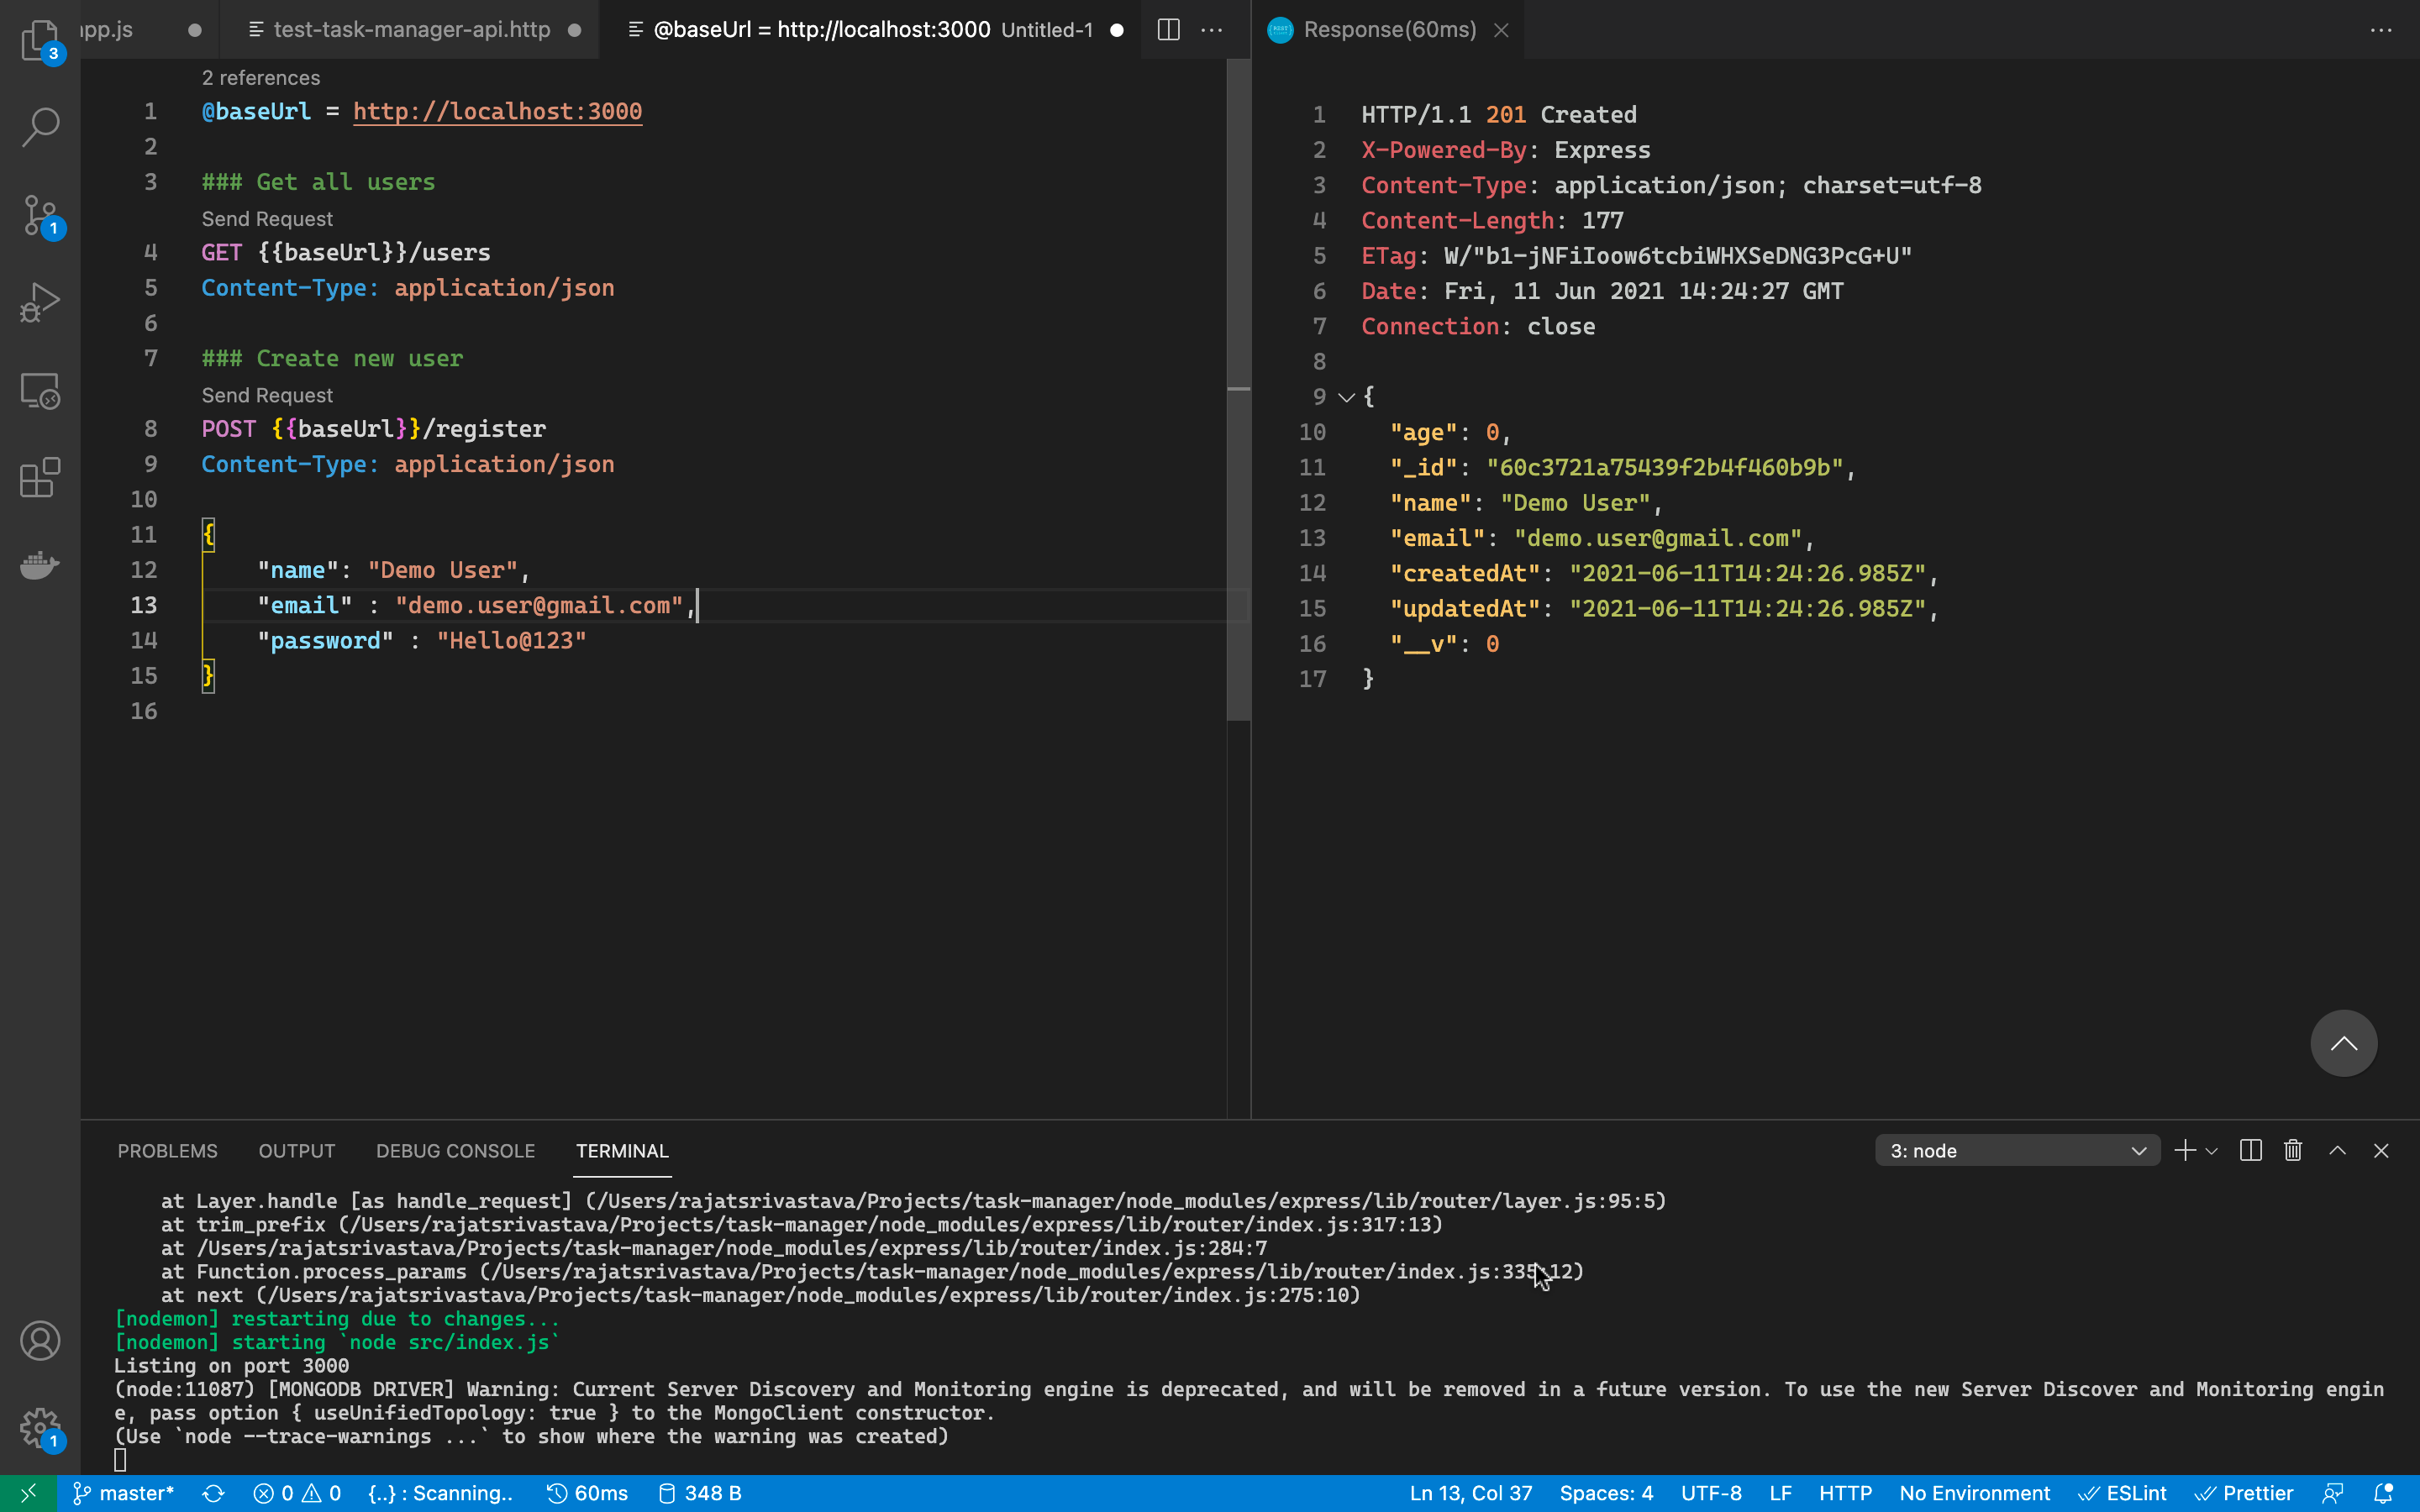
Using Variables
- Like Postman and other tools we can also create and use variables in rest-client
- Just use the @ symbol before the variable and assign the value to it
- We are going to create @baseUrl variable to save the base URL of our server
@baseUrl = http://localhost:3000
- We can now replace this in all our request url's
- The variables need to be written inside two curly braces but vs code is smart enough to automatically add those when you type the variable name
- Below is our modified requests now
Naming Request
- We can also assign names to our request to tag them
- This is done so that we can later you these names and save the response if required
- Let us now implement our login API and assign the name tokenApi to this request
# Login
# @name tokenAPI
POST {{baseUrl}}/login
Content-Type: application/json

{
    "email" : "hello.123@gmail.com",
    "password": "Hello@123"
}
- We can now anytime use the tokenAPI variable to access the response of this API
Storing the Response
- Next we will save the response of our tokenAPI in a variable so that we can use that variable going forward in all other requests which require authentication
- This is done by creating a simple variable and accessing the response body
@authToken = {{tokenAPI.response.body.token}}
- At this stage, we now have our JWT token stored in authToken. Lets now use this token to make secure calls
Adding Authentication Headers
- Like the Content-Type we have used earlier, we can also just provide the value of Authentication header for the request which needs them
### Get my user profile
GET {{baseUrl}}/users/me
Content-Type: application/json
Authorization: Bearer {{authToken}}
Conclusion
So today we saw how we can create a request-response flow for all our related endpoints and save them in a single .http file.
You can visit the Github link provided earlier to see a sample of the file which I have used here for reference. Till next time, keep learning and keep building 📚🙇🚀


