Upload files to Azure Blob Storage using Asp.Net Core Web API

Introduction
In this article, we are going to see how we can upload multiple files in Azure Blob Storage using Core REST APIs. I'll be using the Free Tier of the Azure account which provides sufficient resources to play around.
Setting up Azure Blob Storage
Let us first quickly spin up a basic Azure Blob Storage resource on the Azure portal where we will be uploading our files.
Creating an Azure storage account
Go to the Azure portal (portal.azure.com) and log in with your account.
Click on the "Create a resource" button and search for "Storage account".
Click on the "Storage account" option and then click the "Create" button.
Fill out the required information, including the subscription, resource group, and storage account name.
For the free trial leave the pre-selected values for Region, Performance and Redundancy unchanged.
Other fields can be skipped as they are not required for this demo.
Finally, click on "Review + create" and then "Create".
Setting up a container for storing the files
Once the storage account has been created, go to the storage account page in the Azure portal.
In the left navigation menu, click on "Containers".
Click on the "New container" button to create a new container (named here as "apiimages") for storing the files.
Give the container a name, select a public access level, and then click on "Create".
Generating the connection string for accessing the storage account from the C# code
Go back to the storage account page in the Azure portal.
Click on "Access keys" in the left navigation menu.
Copy the connection string for key 1 and save it for later use in the REST API.

Setting up Dot Net Core Web API Project
I'll be using the latest version of the Web API based project in Visual Studio here and the only Nuget dependency required is Azure.Storage.Blobs.
Controller
The requirement is to have two endpoints one to upload multiple files and the other to fetch the details of those files from Azure.

C# provides us with a type called IFormFile which can be used to send a file over an HTTP Request. We will be using a collection of this type to support the option of multiple file uploads.
using AzureBlob.API.Service;
using Microsoft.AspNetCore.Mvc;

namespace AzureBlob.API.Controllers
{
    [Route("api/[controller]")]
    [ApiController]
    public class AttachmentController : ControllerBase
    {
        AzureBlobService _service;
        public AttachmentController(AzureBlobService service)
        {
            _service = service;
        }

        [HttpPost]
        public async Task<IActionResult> UploadBlobs(List<IFormFile> files)
        {
            var response = await _service.UploadFiles(files);
            return Ok(response);
        }

        [HttpGet]
        public async Task<IActionResult> GetAllBlobs()
        {
            var response = await _service.GetUploadedBlobs();
            return Ok(response);
        }

    }
}
There is no business logic implemented in the controller and we just pass on the request to the AzureBlobService which we are going to implement next.
Blob Service to access Azure
There are multiple ways to connect to Azure Storage account from C# and we are going to make use of the connection string which we copied and saved earlier.
I'll add a link for reference below which describes the other mechanism through which this connection can also be established like Azure AD, SAS Token etc.
using Azure.Storage.Blobs;
using Azure.Storage.Blobs.Models;

namespace AzureBlob.API.Service
{
    public class AzureBlobService
    {
        BlobServiceClient _blobClient;
        BlobContainerClient _containerClient;
        string azureConnectionString = "<Primary Connection String>";
        public AzureBlobService()
        {
            _blobClient = new BlobServiceClient(azureConnectionString);
            _containerClient = _blobClient.GetBlobContainerClient("apiimages");
        }

        public async Task<List<Azure.Response<BlobContentInfo>>> UploadFiles(List<IFormFile> files)
        {

            var azureResponse = new List<Azure.Response<BlobContentInfo>>();
            foreach(var file in files)
            {
                string fileName = file.FileName;
                using (var memoryStream = new MemoryStream())
                {
                    file.CopyTo(memoryStream);
                    memoryStream.Position = 0;
                    var client = await _containerClient.UploadBlobAsync(fileName, memoryStream, default);
                    azureResponse.Add(client);
                }
            };

            return azureResponse;
        }

        public async Task<List<BlobItem>> GetUploadedBlobs()
        {
            var items = new List<BlobItem>();
            var uploadedFiles = _containerClient.GetBlobsAsync();
            await foreach (BlobItem file in uploadedFiles)
            {
                items.Add(file);
            }

            return items;
        }
    }
}
First, make use of the BlobServiceClient class exposed by the Azure.Storage.Blob namespace to create a client with the connection string.
We then need to fetch the particular container on which we intend to perform the operations. This is done using the GetBlobContainerClient with the container name as a parameter on the BlobServiceClient object.
The container client has a method to directly upload blobs to Azure using a file stream and the name of the file. In the UploadFiles function we make use of this feature and convert the IFormFile to a FileStream type and pass it on to the UploadBlobAsync
The response from Azure is of type BlobContentInfo which contains multiple properties describing the file just uploaded.
The container client also introduces a method called GetBlobsAsync which returns an async pageable BlobItem type which can be iterated upon to get the individual item. This method returns all the blobs available in the container and has parameters to allow pagination and other filtering capabilities.
Also, make sure to inject the dependency of the AzureBlobService in the startup or Program file based on the DotNet Core version so that it is available in the constructor of our AttachmentController defined above.
builder.Services.AddSingleton<AzureBlobService>();
That's it, we have the code in place to accept files and then pass them on to Azure. Let's test our code out using Postman
Testing using Postman
Postman provides us with the capability to upload multiple in the body of our HTTP request. This can be done using the form-data type of content and selecting the File type as File from the drop-down.
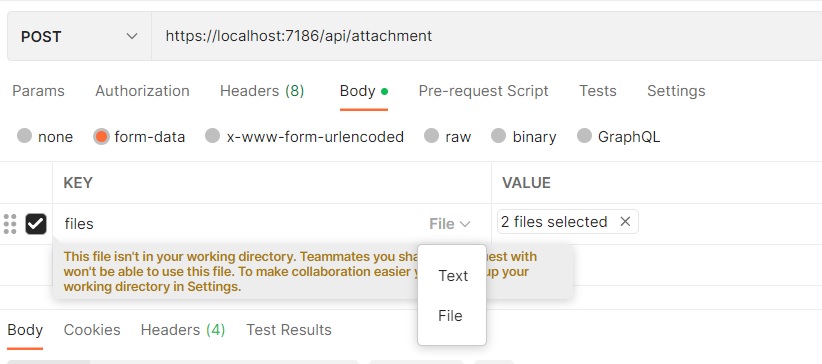
The key name here is the same as the variable name in the Post method of our API. For the value part, multi-select is allowed and the same can be utilized to select the files to be uploaded.
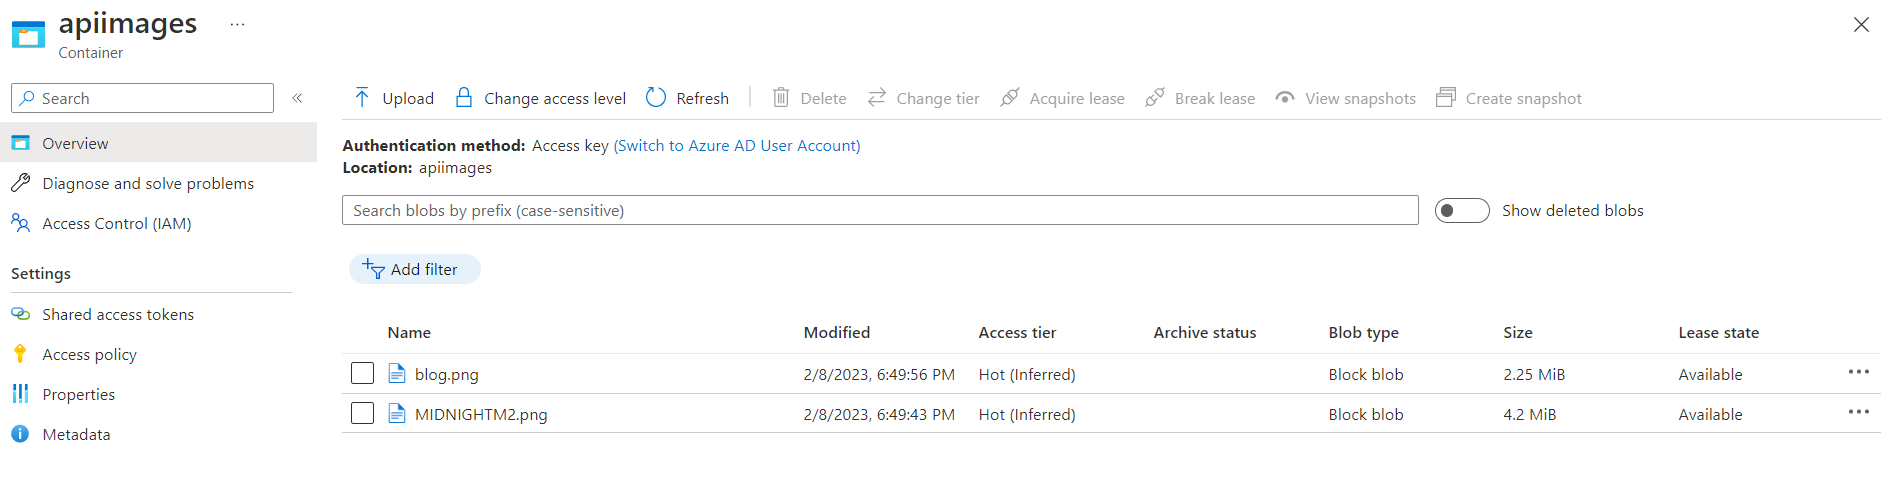
The response from the API if all goes through should be something like the below and the selected files should also be available in the container on azure.

Conclusion
We have successfully uploaded and fetched files from Azure Blob Storage using the Web APIs created in Asp.Net Core.
The source code for the demo application described here is available on GitHub.
Some of the links for reference are mentioned below
Thanks for reaching this far and I hope this article helped you in some way for the query which landed you here. Keep building.


